DOWNLOAD
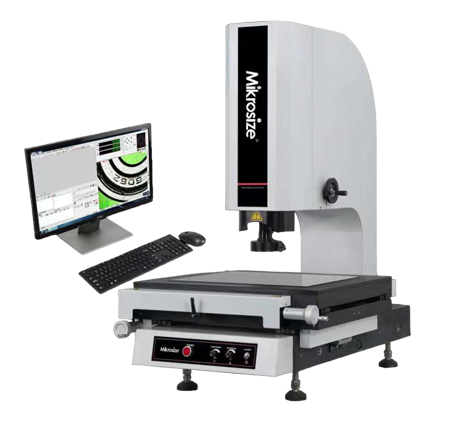
VMA manual video measuring systems
• Powerful measuring software with auto tracing-edge function, multioutput report.
• Sub-pixel segmentation technology improves the ability of image boundary resolution.
• The surface cold light source can be used to measure the complex workpieces.
• With laser pointer, easy to find the specific location of the measured workpiece.
• Stable granite workbench with “00” Grade.
• German made high precision polish rod and bearing.
• High resolution video system.
• Renishaw measuring probe is optional for simple 3D purpose.
Technical features:
| 2.5D model | VMA-2010 | VMA-3020 | VMA-4030 | VMA-5040 |
| 3D model | VMA-2010P | VMA-3020P | VMA-4030P | VMA-5040P |
| X – Y axes travel distance | 200x100 m | 300x200 mm | 400x300 mm | 500x400 mm |
| Z axis travel distance | 200 mm | |||
| Dimensions | 600x500x920 mm | 750x520x980 mm | 1000x620x990 mm | 1100x950x1660 mm |
| Net weight | 120 kg | 150 kg | 180 kg | 360 kg |
| X – Y axes accuracy | 2.5+L/100 µm | |||
| Loading weight of working stage | 25 kg | |||
| Image sensor | TEO 1/3” colorful CCD camera | |||
| Objective lens | Manual position zoom lens | |||
| Video total magnification | Optic zoom lens: 0.7 ~ 4.5x; Objective lens: 20 ~ 148x | |||
| Resolution | 0.5 µm | |||
| Working distance (standard) | 92 mm | |||
| Object view | 8.1 mm ~ 1.3 mm | |||
| Movement system | X – Y axes: polish rod; Z axis: T-type screw rod | |||
| Data processor | RS-100 | |||
| Illumination | Surface: 8-division LED cold light; Contour: adjustable 256-grades LED cold illumination | |||
| Measuring software | Mikrosize | |||
| Power source | AC 100 ~ 220 V; 50/60 Hz; 10 A | |||
| Working environment | Temperature: 20°C ± 2°C; Temperature variation < 2°C/hr; Humidity: 30 – 80% | |||
| Vibration < 0.002 g, 15 Hz | ||||
Packing list:
| Mainframe / Dell PC system | Zoom lens 0.7 – 4.5x | LED light source |
| RS-100 data processor | 1/3” CCD camera | Mikrosize measuring software |
| Linear scale | Calibration block / Capture card | Instruction manual / Anti-dust cover |
| Z axis high precision linear guide rail | 100 mm length block (3D) | Renihshaw probe (3D) |


