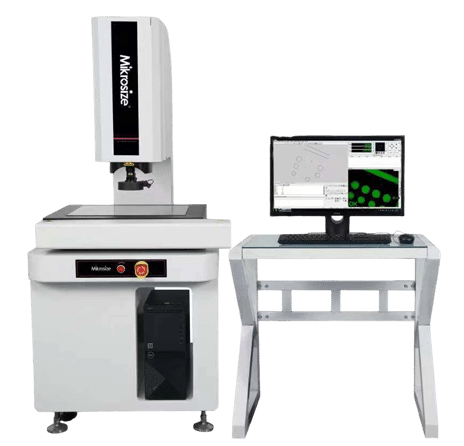
VMC CNC video measuring systems
• CNC fully auto close loop control, auto measurement; integrative design, convenient for measuring.
• Stable and reliable marble base, ensuring high measure speed, accuracy and precision.
• Precision linear guide and grinding ball screw, AC servo motor ensures accuracy.
• High precision linear scale, resolution is 1 μm, great stability.
• Manual zoom lens and 1/2″ color high resolution CCD camera.
• Programmable 5 ring, 8-division LED surface illumination.
• Contour parallel LED illumination, can realize 256 grade brightness adjustment intelligently.
• Optional touch probe, realize 3D measurement.
Technical features:
| 2.5D model | VMC-3020 | VMC-4030 | VMC-5040 | |
| 3D model | VMC-3020P | VMC-4030P | VMC-5040P | |
| X – Y axes travel distance | 300 x 200 mm | 400 x 300 mm | 500 x 400 mm | |
| Z axis travel distance | 200 mm | |||
| Dimensions | 750 x 520 x 980 mm | 1000 x 620 x 990 mm | 1300 x 750 x 1000 mm | |
| Maximum load capacity | 25 kg | |||
| Net weight | 240 kg | 280 kg | 360 kg | |
| X – Y – Z 3-axes linear scale (2.5D) | Resolution: 0.5 µm | |||
| Accuracy | E1(x/y) = 2.5+L/100 µm | |||
| Repeatability | ± 2 µm | |||
| Movement system | X – Y – Z axes: screw rod | |||
| Movement control | CNC auto servo movement control | |||
| Video system | TEO 1/2” color CCD camera | |||
| Manual coaxial zoom lens | ||||
| Optical magnification: 0.7 – 4.5x; Video magnification: 20 – 148x | ||||
| Working distance (standard): 92 mm | ||||
| Object view (standard) | 11.1 ~ 1.7 mm | |||
| Speed | X – Y axes: 200 mm/s; Z axis: 50 mm/s | |||
| Illumination | Contour: adjustable 256-grade LED parallel illumination | |||
| Surface: adjustable 256-grades 5-ring and 8-division LED cold illumination | ||||
| 3D measurement | 3D module and UK Renishaw touch probe | |||
| Measuring software | Mikrosize | |||
| Working environment | Temperature: 20°C ± 2°C; Temperature variation < 2°C/hr; Humidity: 30 – 80% | |||
| Power source | AC 100 ~ 220 V; 50/60 Hz; 10 A | |||
Packing list:
| Measuring software | CCD camera / Video capture card | Manual coaxial zoom lens |
| Mainframe / Dell PC system | Scale transfer / Movement control card | 8-division LED illumination |
| Linear scale / Calibration block | 100 mm length block (3D) | Renishaw probe (3D) |
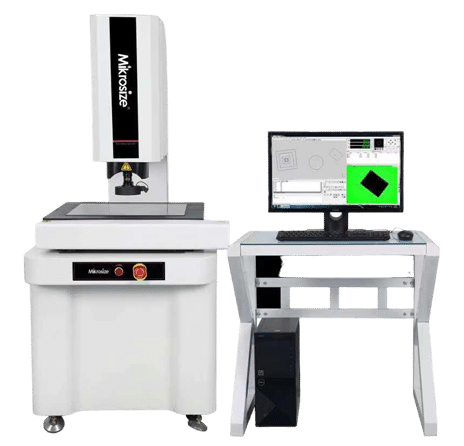
VMU CNC video measuring systems
• CNC fully auto close loop control, auto measurement; integrative design, convenient for measuring.
• Stable and reliable marble base and pillar speed, accuracy and precision.
• Precision linear guide and grinding ball screw, AC servo motor ensures accuracy.
• High precision linear scale, resolution is 1 μm, great stability.
• Manual zoom lens and 1/2″ color high resolution CCD camera.
• Programmable 5-ring, 8-division LED surface illumination.
• Contour parallel LED illumination, can realize 256 grade brightness adjustment intelligently..
• Optional touch probe for 3D measurement.
Technical features:
| 2.5D model | VMU-3020 | VMU-4030 | VMU-5040 | |
| 3D model | VMU-3020P | VMU-4030P | VMU-5040P | |
| X – Y axes travel distance | 300 x 200 mm | 400 x 300 mm | 500 x 400 mm | |
| Z axis travel distance | 200 mm | |||
| Accuracy | E1(x/y) = 2.5+L/100 µm | |||
| Video system | TEO 1/2” colorful CCD camera | |||
| 6.5x auto coaxial zoom lens | ||||
| Optical magnification: 0.7 – 4.5x; Video magnification: 20 – 148x | ||||
| Working distance: 92 mm | ||||
| Object view (standard) | 11.1 ~ 1.7 mm | |||
| Linear scale resolution | 0.5 µm | |||
| Movement system | X – Y – Z axes: screw rod | |||
| Movement control | CNC auto servo movement control | |||
| Speed | X – Y axes: 200 mm/s; Z axis: 50 mm/s | |||
| Illumination | Contour: adjustable 256-grade LED parallel illumination | |||
| Surface: adjustable 256-grades 5-ring and 8-division LED cold illumination | ||||
| 3D measurement | 3D module and UK Renishaw MCP-K2 touch probe | |||
| Measuring software | Mikrosize | |||
| Maximum load capacity | 25 kg | |||
| Dimensions | 750x520x980 mm | 1000x620x990 mm | 1300x750x1000 mm | |
| Net weight | 240 kg | 280 kg | 360 kg | |
| Working environment | Temperature: 20°C ± 2°C; Temperature variation < 2°C/hr; Humidity: 30 – 80% | |||
| Power source | AC 100 ~ 220 V; 50/60 Hz; 10 A | |||
Packing list:
| Measuring software | CCD camera / Video capture card | 6.5x auto coaxial zoom lens |
| Mainframe / Dell PC system | Scale transfer / Movement control card | 8-division LED illumination |
| Linear scale / Calibration block | 100 mm length block (3D) | Renishaw probe (3D) |


