DOWNLOAD

Flaw detectors

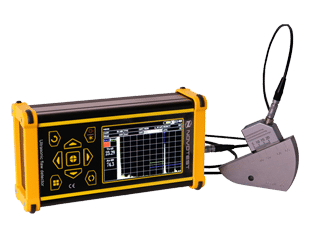
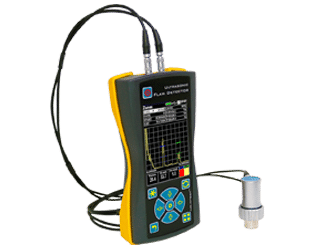
Ultrasonic flaw detector – UD2301

An ultrasonic flaw detector is designed to search for voids and inhomogeneities inside the materials under testing with ultrasound. It is the most common device in the world for non-destructive testing of metal (and other materials with low attenuation of ultrasonic waves) products in production, as well as objects in operation. Ultrasonic flaw detector UD2301 is a powerful, ergonomic, portable device that has all the functions of a general industrial ultrasonic flaw detectors and can be used in laboratories and workshops, and is perfect for field use. The device is supplied with PC software for uploading the measurement archive and processing the results.

Advantages:

• Superbright display with which it is comfortable to work outdoors on a sunny day.
• Frequency range from 0 to 10 MHz, with smooth adjustment.
• Display of a scale of scanning in microseconds and millimeters.
• Construction and processing A-scan and B-scan.
• The presence in the device of the operating mode of the DAC curves (construction of 16 points).
• Existence in the device of TVG mode (construction of 16 points).
• DGS function, with automatic calculation of the equivalent reflector size.
• Archive of measurements, settings, transducers with the ability to transfer data to a PC.
• Any side display orientation options that allow user to work in any position of the device.
• The device operates on standard AA batteries, as well as on conventional batteries, which makes them easy to replace.
• The UD2301 flaw detector can be powered by a universal mobile battery (power bank) via a mini USB connector.
• Ergonomic shockproof case with protective rubber protectors.
• Light weight and compact size.

Standard supply:

• Ultrasonic flaw detector
• UT-probes – 2 pcs
• Cable Lemo-Lemo – 1 pc
• AA batteries – 3 pcs
• Charger
• USB cable for PC connection
• Case
• Operating manual

Optional accessories:

• Couplant
• UT-probes
• Calibration blocks

Ultrasonic flaw detector – UD2303

Ultrasonic flaw detector UD2303 is a compact version of an industrial flaw detector with a set of functions and modes that are designed to simplify the routine process of product quality control as much as possible. Shock-resistant aluminum alloy case with a large battery will provide a long service life of the device and ability to be used in adverse conditions. UD2303 ultrasonic flaw detector has the function of screen rotation.

In other words, there is no need to hold the device in one position, since by pressing the button you change the position of the screen relative to the device, horizontally or vertically. Also, thanks to this feature, device is suitable for left-handed and right-handed people.

Features:

Device is designed to control the quality of products made of various materials, including: metal, plastic, glass, composite materials and etc. Device functions provided are checking the continuity of materials and identifying places of inconsistency, search for hidden corrosion, cracks and other internal defects by above listed materials. Ultrasonic flaw detector provides thickness measuring of various products, structures and it is able to perform inspection of welded seams, which would be useful both at the intermediate stages of production and the incoming inspection of semi-finished products.

Advantages:

• Automatic calibration.
• Intuitive device menu.
• Adjustable excitation pulse generator.
• Saving measurement results and ability to viewing.
• Transfer of archived records to PC.

Standard supply:

• Ultrasonic flaw detector
• UT-probes – 2 pcs
• Cable Lemo-Lemo – 1 pc
• Charger
• USB cable for PC connection
• PC program ( available from site download)
• Case
• Operating manual

Optional accessories:

• Additional probes (UT) and cables
• Standard calibration blocks
• Custom calibration blocks
• Couplant (gel)

DOWNLOAD

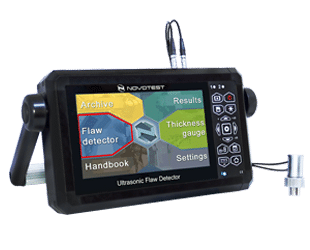
Ultrasonic flaw detector – UD3701

The ultrasonic flaw detector UD3701 is designed to detect internal defects, such as discontinuities and heterogeneities of materials in products and welds, determine coordinates and evaluate defect parameters, measure thickness and the velocity of propagation and attenuation of ultrasonic waves in the materials (metals, plastics, glass and etc.), the search for places of corrosion, cracks, internal delamination and other defects.

Ultrasonic flaw detector UD3701 is a universal, powerful, functional, ergonomic and reliable device for solving tasks of ultrasonic flaw detection both in the laboratory and in the field. Using special software, the device allows user to transfer to the PC a previously saved measurement archive. Also in the device it is possible to save parameters and settings of tested objects and used probes.

Advantages:

• Superbright, touch display with which it is comfortable to work outdoors on a sunny day.
• Automatic calculation of the delay in the probe.
• Frequency range from 0 to 10 MHz, with smooth adjustment.
• Display of a scale of scanning in microseconds and millimeters.
• The presence in the device of the operating mode of the DAC and TVG curves (up to 16 points).
• The presence in the flaw detector of the DGS control mode, with automatic calculation of the equivalent reflector zone.
• Carrying out settings both using the touch screen and keyboard.
• The presence of movable blocks of output of measured values, so it can be located in any part of the A-scan.
• Archive of measurements, settings, probes with the ability to transfer data to a PC.
• Simulation of a measurement from a stored record in the device memory.

Standard supply:

• Ultrasonic flaw detector
• UT-probes – 2 pcs
• Cable Lemo-Lemo – 1 pc
• Charger
• USB cable for PC connection
• Case
• Operating manual

Optional accessories:

• Additional probes (UT)
• Additional cables Lemo-Lemo
• Charger
• Bag for comfortable operating
• Calibration blocks

Magnetic flaw detector

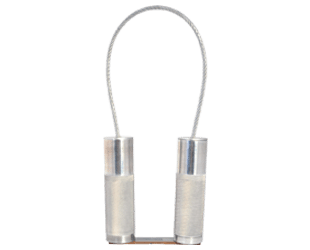
Magnetic flaw detector (magnetic yoke) MPD-DC applies in circumstances where the electric equipment must not be used or is prohibited by the rules. Device is used during magnetic particle inspection (where it is applicable) according to ASTM E 709, ASTM E 1444, ASME Section V Article 7 and MIL-STD-1949. Magnetic flaw detector MPD-DC is used to detect surface and subsurface cracks of all kinds (flake, lack of fusion welded joints, tears etc.) in structures made of ferromagnetic materials.

The device has two permanent magnets placed in a cylindrical shells, which are connected by a flexible magnetic wire, so it can be used for MPI of remote locations, corner welds and other products of various shapes and sizes.

Advantages:

Magnetic flaw detector MPD-DC can be used in cases when user can not use electromagnets, when supply of power is difficult or restricted by rules of safety (during works at height; working in the field conditions; testing of internal surface of tanks, boilers; etc.) at operating temperature from 30°C below zero to 50°C above zero and relative humidity up to 95% at 35°C.

Standard supply:

• Ultrasonic flaw detector
• Bag
• Operating manual

Optional accessories:

• Separated magnetic flaw detector.
• Set of materials for magnetic particle inspection.
• Magnifying glass.
• Flashlight.
• Control sample for the MPI.

DOWNLOAD

Pulse Holiday Detector

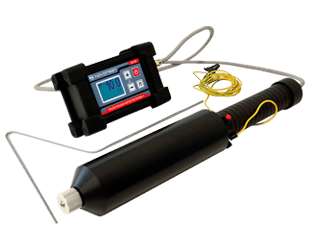
Pulse Holiday Detector SPARK-1 is a device for detecting defects (thinning, microholes, cracks, etc.) in dielectric coatings on metals.
The principle of operation of the device is based on the electrospark method. A probe with electrode connected to one pole of the voltage source scans the surface of the tested object directly along the coating. The second pole of the voltage source from the ground connector is connected directly to the metal structure. The electronic unit fixes the gaps by voltage between the electrode and the conductive base.

Advantages:

• Reliability.
• Small size and lightweight.
• High capacity batteries.
• Long battery life with enhanced battery.
• Accurate digital voltage and sensitivity settings.
• Indicator of batteries charge.
• Sound defect signaling.

Standard supply:

• Electronic unit
• Probe
• Ground wire with crocodile clip
• T-shaped electrode
• Charger
• Package
• Operating manual

Optional accessories:

• T-type rod probe
• C-type wire brush probe
• Band-brush probe
• Spring probe

UT probes (transducers)

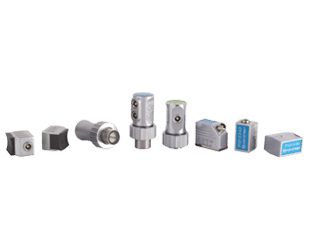
We offer probes (transducers) of general type, and special-purpose, standard and custom: straight beam, angle beam, dual element, ground in and others.

All the transducers are designed for using with ultrasonic flaw detectors.

Connector type: Lemo 00 (other connectors – by request).

Contact dual-element transducers are designed for testing welded and brazed joints of the elements of metal structures, pipelines for detection the different kinds of defects (cracks, non-metallic particles, pores, lack of fusion, scratches, surface cracks, etc.).
Straight beam contact transducers are designed to detect internal defects (pores, cracks, delamination and others), also they are used for searching local thinning walls in metal structures and walls of the product, including the low-alloyed and austenitic steels products.
Transducer grounds are designed to detect internal defects of pipes and for searching local thinning walls of the pipes, including the low-alloyed and austenitic steels products.

DOWNLOAD

Calibration blocks

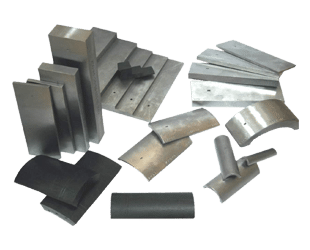
Calibration blocks with notches are used to configure the sensitivity and duration of scan of ultrasonic flaw detectors for testing of various products (mainly flat sheets and pipes).
Calibration blocks with notches (corner reflectors) are made of the same material as the tested object, wherein the geometry (thickness and surface radius of standard sample) has the same characteristics as tested item.

Reference blocks

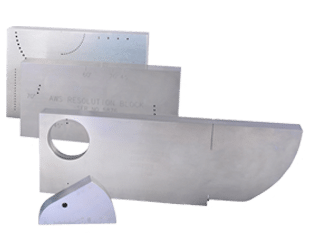
Reference block V1 allows to:
• Determine the insertion point of ultrasonic oscillations and distance from the piezoceramic plate to the probe housing with accuracy ± 0.5 mm.
• Define the angle of input of the ultrasonic oscillations with accuracy ±1 angle degree.
• Define the uncontrollable (dead) zone (for steel) straight beam ultrasonic piezoelectric transducers.
• Determine the linearity of ultrasonic scanning horizontally.

• Configure the speed and sensitivity of the scan of straight beam, angle beam and dual element piezoelectric transducers.

Reference block V2 allows to:
• Calibrate the scanning of flaw detectors through the expansion velocity of ultrasonic waves, working with straight beam piezoelectric transducers.
• Calibrate the scanning of flaw detectors through the expansion velocity of ultrasonic waves, working with angle beam piezoelectric transducers.
• Set conditional sensitivity of ultrasonic flaw detectors with straight beam and angle beam piezoelectric transducers.
• Determine the output point of ultrasonic oscillations and distance from the piezoceramic plate to the probe housing.
• Define the angle of input of the ultrasonic oscillations into steel.

But there are available other types of blocks in accordance to different standards (ISO, DIN, etc.). If need them, you can have UT or PAUT blocks in compliance with other standards.